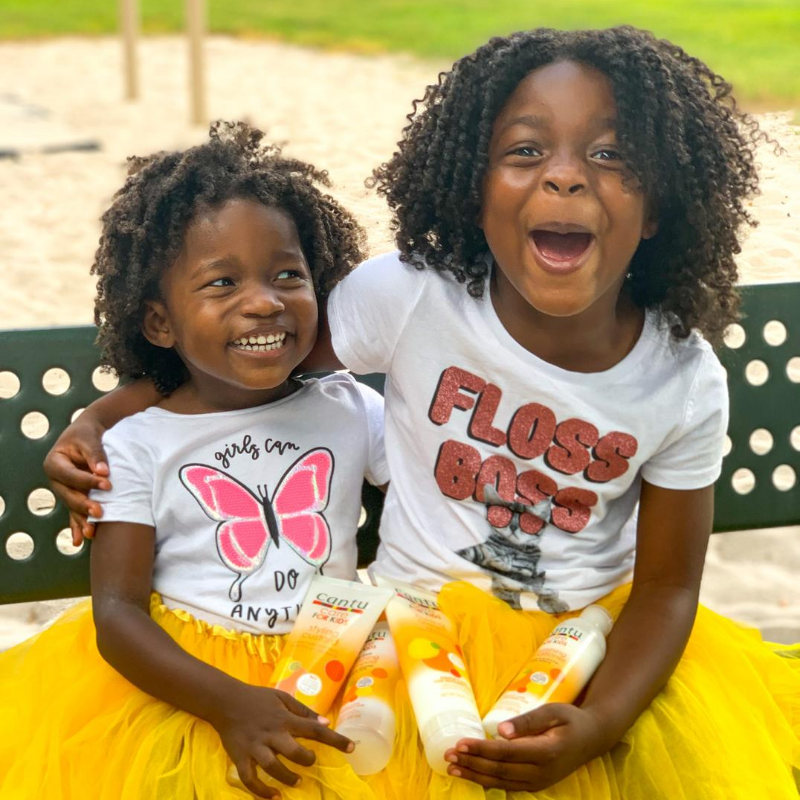
I know this post is long overdue but I finally wrote it. I’ve been natural for fourteen years so I thankfully mastered my natural hair routine prior to having my daughters. While we all have natural hair our hair types range from 3c-4c (I think) and so what works for one of us doesn’t always work for the other but we’ve thankfully been able to find products that do work well in all of our hair. In this article I’m giving you our weekly natural hair routine, general natural hair care tips and tips for traveling with natural hair.

Our Natural Hair Routine
We typically wash our hair once a week and I won’t lie it’s a process! It was actually one of my motivations of cutting my hair, less hair to take care of! This natural hair routine includes a deep condition, you don’t have to do one every week if you don’t feel like you need to.
Step One: Detangle and Separate
Separate your hair into sections and detangle. This step is crucial as it will make the washing process faster and less painful. It’s also easier with kids as I do this on the couch while they watch TV, read less complaining! To detangle I wet each section using a spray bottle and apply a little bit of conditioner. Then I detangle using this Denman brush starting from the ends of the hair and making my way up to the root. After I detangle a section I braid it, usually ending up with 5-6 sections.

Step Two: Shampoo
Next it’s time to wash! Again I wash their hair in sections, unbraiding one to two braids at a time, ending up with 3-4 sections to wash. For my hair I use Creme of Nature Argan Oil shampoo. For the girls hair I was using the Cantu kids line, tear-free shampoo. I love it because it works great on both of their hair textures and of course no crying if it gets in their eyes.

I’ve recently got another brand, Hair of Nature, as a gift, it’s actually a small black owned company by a mompreneur and have been using it for the past few months. We’ve liked the results of this brand as well. You can check out their curl moisture shampoo here and use promo code TRAVELINGCHILD for 10% off!
Step Three: Protein Treatment
After washing our hair I give each of us a protein treatment using Redken’s Extreme CAT Anti-Damage Protein Reconstructing Treatment. I apply this around our edges and on our scalp, massaging it in and then brushing it through our hair for even distribution. We leave it in for five minutes while sitting under our softhooded dryer. We only do protein treatments once every six weeks. If your hair is damaged and it’s your first time doing protein treatments you can do them once a week for four weeks to restore your hair and then every six weeks.

Step Four: Conditioner
If we aren’t doing a protein treatment step four becomes step three and that is our applying our conditioner. You must always condition your hair after a protein treatment so never skip this step. Some weeks we use regular conditioners, me using the Creme of Nature Argan Oil conditioner and the girls using the Cantu tear-free conditioner. Other weeks it’s time for a deep condition (typically alternating these) and then we’ve been using Hair of Nature’s Herbal Reconstruction Deep Conditioner which I absolutely love.
If we are doing a regular condition we just rinse and move onto styling. However, when doing a deep conditioner treatment we sit under our softhooded dryer for 30 minutes.

Step Five: Leave in Conditioner or Styling
After we’ve rinsed out the deep conditioner we’ll either put in a leave in conditioner and then style or just style. The leave in conditioner provides extra moisture so I do recommend doing it if your hair tends to dry out more. I use As I Am’s leave in conditioner.
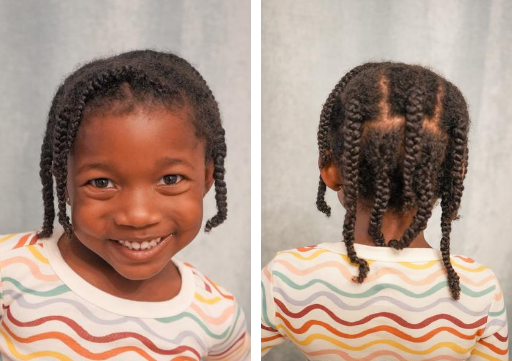
To style our hair we do braids outs or twist outs. For both to get defined hair I always twist or braid the roots to the scalp. This makes such a huge difference is the overall look of their curls. Below is an example of what I mean on a twist out.


For braid outs I do exactly the same. For my older daughter, Jordyn, her hair is thinner and she has looser curls. For her I’m able to do 5 braids or twists and her hair will come out big and defined. Realistically for her I don’t have to braid/twist to the scalp at first but it holds better at night. However, for my younger daughter, Kennedy, she has 4c hair so I have to do more braids and twists to get the same defined curls, if I don’t her hair doesn’t look as good.


I let their hair dry overnight. Be sure to put them in a satin hair bonnet or have them sleep on satin pillow cases. Silk is actually the best but those pillow cases are quite expensive! Then in the morning I will take it down simply by unbraiding or untwisting their hair.


Wash N Go
We all know unless you have a specific hair texture a wash n’ go is never that easy! I actually remember when I first became natural and was brave enough to wear my curls I washed my hair and went out and was utterly confused about why I looked so crazy later on. My friend was like “so you didn’t use any product” lol, no sis I did not, but lesson learned.
When doing a wash and go on our hair after we’ve conditioned it I put Design Essentials Natural Curl Enhancing Mousse in. I use our Denman brush to brush it through the hair to make sure it’s gotten on all the strands. Next I apply Redken Curvaceous Ringlet Shape Perfecting Lotion and I will quickly finger curl the top layer of hair. This is how I achieved the look in the image below.

Night Time Routine
Once styled at night we still use our bonnets or satin pillow cases. You can either retwist or rebraid the hair or use the pineapple method. Here are two videos that explain this method better than I can: short natural hair or longer natural hair.
Tips for Traveling with Natural Hair
One of the questions I get the most is how we maintain our curls when traveling with natural hair. The short answer is we do the same things we do at home! Our hair routine doesn’t change at all when we’re traveling if we’re wearing our hair out and don’t have a protective style (more on those below). This is one of the reasons I got the softhooded dryer, it’s easy to travel with, folding down to the size of my hand.
When traveling to a destination where I know we’ll be swimming a lot I pack our swim caps. This keeps our hair protected and prevents me from having to wash hair multiple times during our trip. I absolutely love Swimma Caps because they are black owned and specifically made to fit afros, dreadlocks and braids! You can use promo code THETRAVELINGCHILD for 10% off until August 31, 2020.

To protect our hair when traveling I also pack our satin pillowcases. We each have an extra one so it’s easy to throw in our luggage. You can also just pack a bonnet but those always come off the girls head which is why I bring the pillow cases.
Protective Styles for Traveling with Natural Hair
When traveling with natural hair it can sometimes be in your best interest to just get a protective style! This will save you so much time when you have to be up for early morning excursions. We especially love protective styles for when we take ski trips. Helmet hair is not cute and gets your hair extremely matted so we always try to get cornrows. An alternative is to do a twist out but not untwist your hair. Don’t forget if you get braids and go swimming, sweat you still need to keep your hair clean. You can use Cantu’s co-wash dry shampoo and be sure to oil your scalp to prevent dry and itchy scalp.

How We Pack our Hair Products
We are team carry-on when traveling (check out our light packing tips) so that means we can’t take full size products with us. That is just fine! You can buy travel size products directly from companies like As I Am and Hair of Nature. If your preferred hair products don’t have travel sized under 3.4oz you can use travel size containers and just fill them with your hair products. This is what we do since it’s typically cheaper to buy the bigger sizes of the products. Then we put them in our packing cubes and we’re off, no need for checked bags!
Our natural hair routine isn’t super simple but this is exactly how we achieve the styles we have. I hope this post has been helpful especially in when it comes to traveling with natural hair. You can find all the hair care products we use including descriptions of what we use each product for in my Amazon store here. Did you find this post helpful? Please share it!
Back to School with Sylvan Learning